i have been considering a larger refined telescope design compared to my 16 inch scope I’ve been working on far too long now. So much time has gone by that technology has changed and software has changed to a point where I was able to created this design shown here using CAD software in 3D. The design has been worked down to the last bolt in detail as well as a 54 point mirror cell design based on PLOP analysis with a 1.5 inch thick mirror. The mirror cell is made entirely aluminum strips positioned in precise patterns to meet the PLOP analysis  requirements, which I will show in detail in the future. The design is not complete, however it is driven by the same design concepts I have tried to implement with my previous scope, that is simplicity and ease of manufacturing the necessary parts and components. There are still challenges i have to work out, but these will come with time. My goal is to make this as low a profile as possible. The focal length is 103 inches, mirror diameter 25 inches. I do have some vignetting at the eyepiece still which needs to be resolved, and i am looking at redoing the cage ring to a hexagonal shape which i believe will be will be easier to make. Keep referring to page to stay updated . Thanks for visiting!
Finally…going to coat this mirror.
As recently as last week i added a post, which came almost two years to the date of when I made my last post on grinding, polishing and figuring my plate glass mirror, or as I call the PGM. This is the third of my 16″ F4 mirror. If you want to read the history of why there were two other mirrors prior to this one, previous posts will divulge the unfortunate incidents where both of them were destroy by accidents. So here, finally is my last FigXP analysis of the surface error. I am quite impressed with the tested surface error. However, I have as yet to perform a star test. Given the quality and results of this test, and baring any dramatic visual errors evident from the star test, i will likely move on to coating this mirror. I’ve spent an unbelievable amount of time getting to this point, and without the use of my grinding and polishing machine which is described in previous posts, years were accumulated in finishing the mirror to the figuring stage. So with the machine, I was dead set on getting the mirror completely done in 6 months. I did not meet this target,obviously, but looks like I will be cutting the time in half or better. My latets FigXP results posted below are quite pleasing to me at this time.
Much, Much further along…and two years later?
I’ve got to the point where the mirror is fairly good correction as you can see from this Figxp analysis below. The amazing thing, I just noticed, was my previous post was almost two years ago to the date, June 1, 2014. Well, what can I say, the time it took to get here was interrupted by various life issues, jobs, job losses, finances, age, whatever you call it, mirror making is almost a constant. But there are a few things I discovered with this mirror at this point which are not obvious with the Figxp test. Doing a star test, I noticed I have some astigmatism with this mirror, and I believe I know where it came from. During the polishing operation, I failed to rotate the position of the mirror on the turntable as frequently as i should have, and this was the result. I’m not actually calling this complete at the moment, and still want to do some more work on the mirror get better smoothing between the zones, This is very careful work with pressing of the lap and figuring going for only 15 minutes, or less at a time.
Mirror Milestone
Leave a reply
Well it’s been awhile, I know, and the last time I posted I had been polishing for a considerable amount of time. In fact I had already had at least 9 hours of time on the machine polishing with 30 to 45 minutes periods. Keep in mind for each one of these, the mirror has to be carefully cleaned and the lap is wire brushed and rinsed thoroughly. Then pressed for an hour or so. As previously mentioned, cleanliness is critical to avoid scratching with any contamination that could find its way between the lap and mirror. I had mentioned the mirror surface being hazy along an area near the edge. Doing some research, I found this is likely due to not having the lap in the ideal location in relation to the mirror on the fixed post machine. Typically, it is best to have the position of the lap overhang the mirror by 1/6 the diameter of the mirror. With my mirror being 16 inches and the lap being 12 inches in diameter, this equates to the lap overhanging the mirror by 2.66 inches. Most of my polishing was done with the lap overhanging the mirror by 2.00 inches. No damage was done, and the spherometer showed I was still achieving a good curve with this adjustment. But after adjusting the lap position, and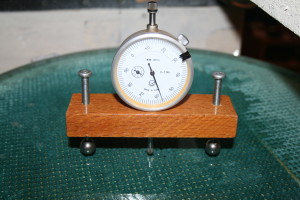 polishing for a few more sessions at 30 to 45 minutes each, improvements were immediately noticeable. In fact after performing another set of laser tests, all the way to the edge, there was no evidence of haziness and the laser was visible at the bottom of the mirror, indicating a clear highly polished surface on top. After one more session of 30 minutes, I declared the machine polishing operation complete! Rinsing the mirror and observing with an off axis image from sun reflection, brings out any fine scratches which are not visible any other way. But this is a tricking and dangerous task, because the mirror is already highly reflective, not a parabola by any means, but directly shining into eyes for any length of time is damage the retina! SO DO NOT DO THIS WITH CHILDREN PRESENT OR CURIOUS. this task is best done briefly and away from these conditions, best place I have found is on lawn in back yard. Fortunately for me I snapped this image when the sky was somewhat cloudy, and still able to achieve results without this risk. The mirror will now be put on the test stand and initial evaluation of the surface and the curvature will be made to determine if additional polishing is required or what strategy I will use to begin the figuring process. Thanks again and stay tuned!!
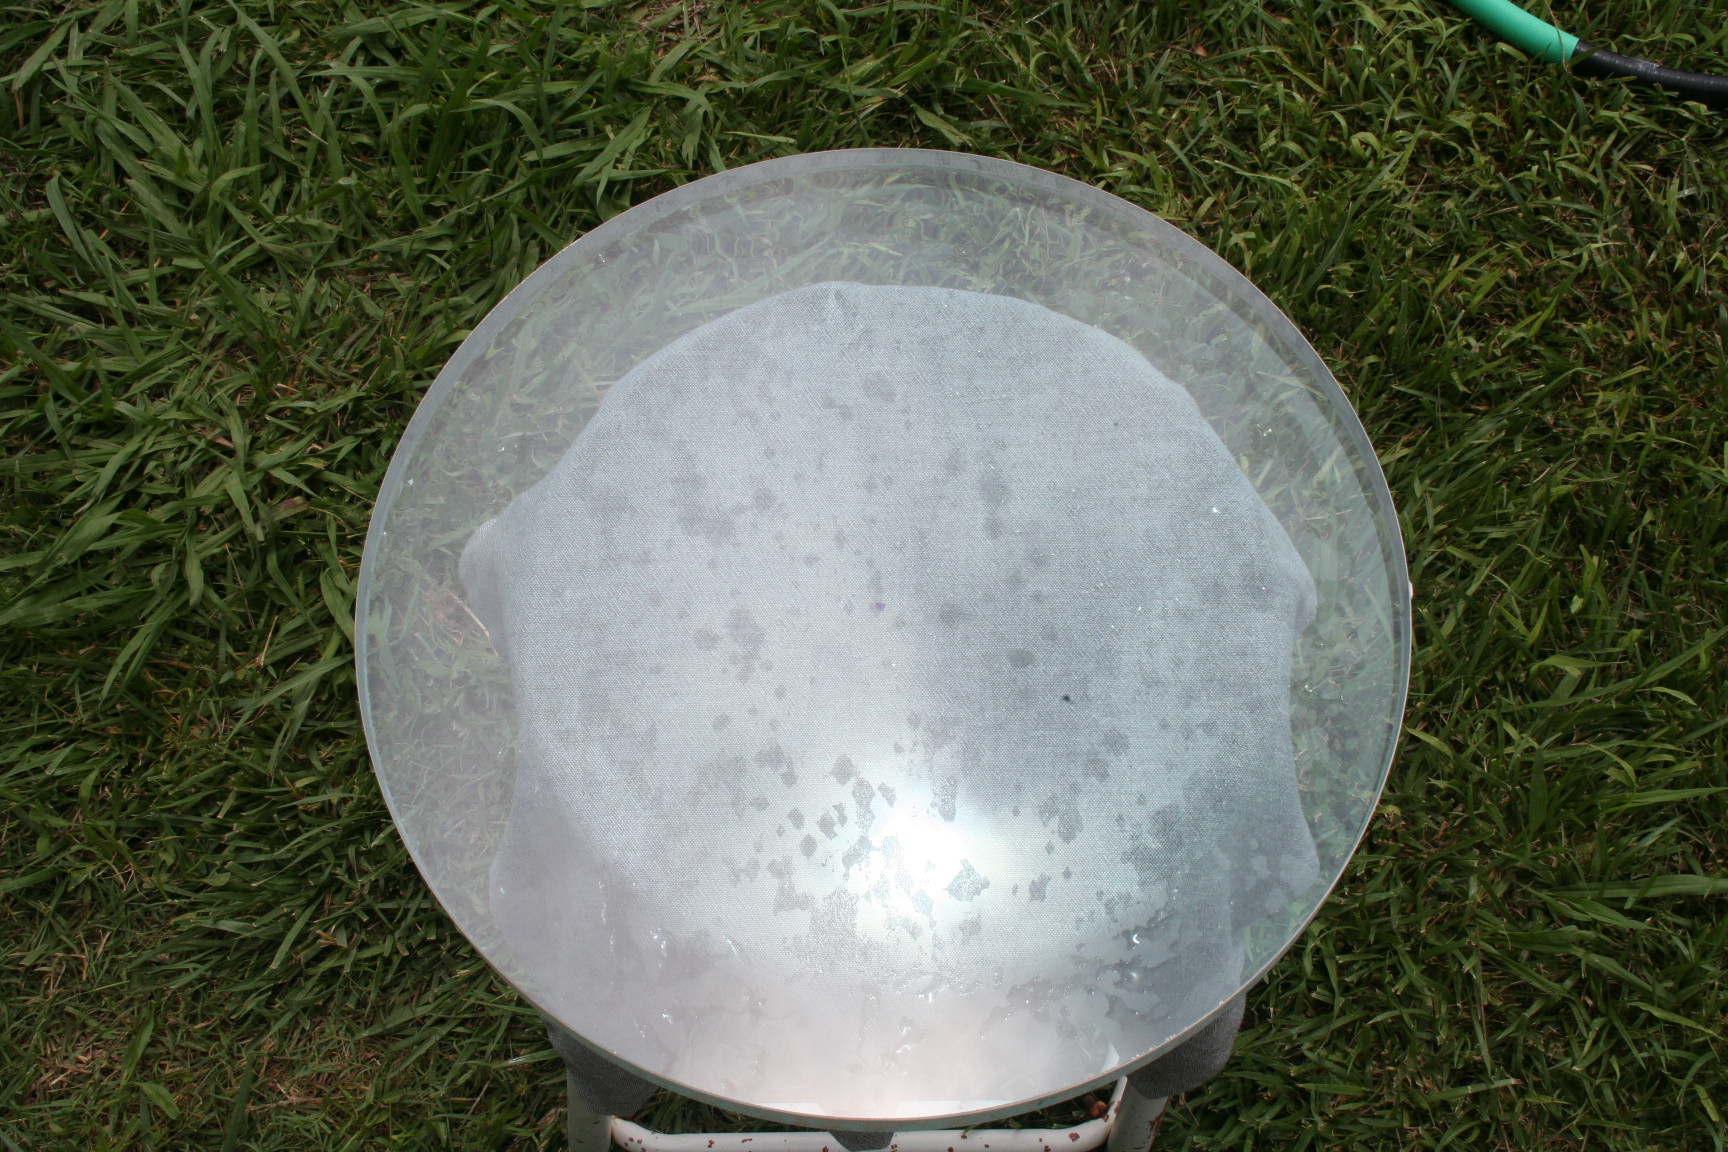
Polishing Update
I remember the amount of labor that went into the previous mirror I had made as I sit and watch the rotation of this new mirror on my rudimentary machine spinning and spinning. I spent a total of six years on the previous one, about 3 of those were trying to figure out the “figure”. This is hands down the most difficult task at mastering mirror making, and I am in no way claiming I have done that. All those years spent was learning and perfecting, and trying to create a high quality piece of glass. Unfortunately, that mirror had turned down edge, something I tried to correct for probably 1.5 of those 3 years. But I am not at that stage yet for this new mirror, and my challenge still is to get the spherical mirror completely polished out. I’ve spent a total machine polishing time of 10 hours (approximately) and things are going quite well, knock on wood. This is the time where a silly or stupid error can screw up the process. To prevent this, one needs to constantly be thinking about that errant spec of dirt or sand or other hard substance that can somehow find its way on to the mirror surface before you begin polishing. One must always think in terms of what can fall on the mirror before you begin each session. Washing the lap every time you start a new polishing session in absolutely essential. The closer you get to competing the polishing stage, the more important this is. It would be very painful to start over. Now, there can be somewhat of an exception to this. By using a machine that I have designed and built my self, I have calculated my reduction in the time to manufacture this mirror from 6 years to 6 months. This is 1200% less time I would have spent not having the machine! So if a minor error would occur, like a scratch from a particle, at least I can rely on a mechanical means to expedite the process. The good news, is I am not in that predicament. So let’s discuss the situation I am in. As I said, after 10 hours of machine polishing, I would have expected, and hoped I would have been completely polished out at this time. But I am not. To determine if you are, it is essential to have a small laser available as I have previously mentioned on this site. Looking at the image below, 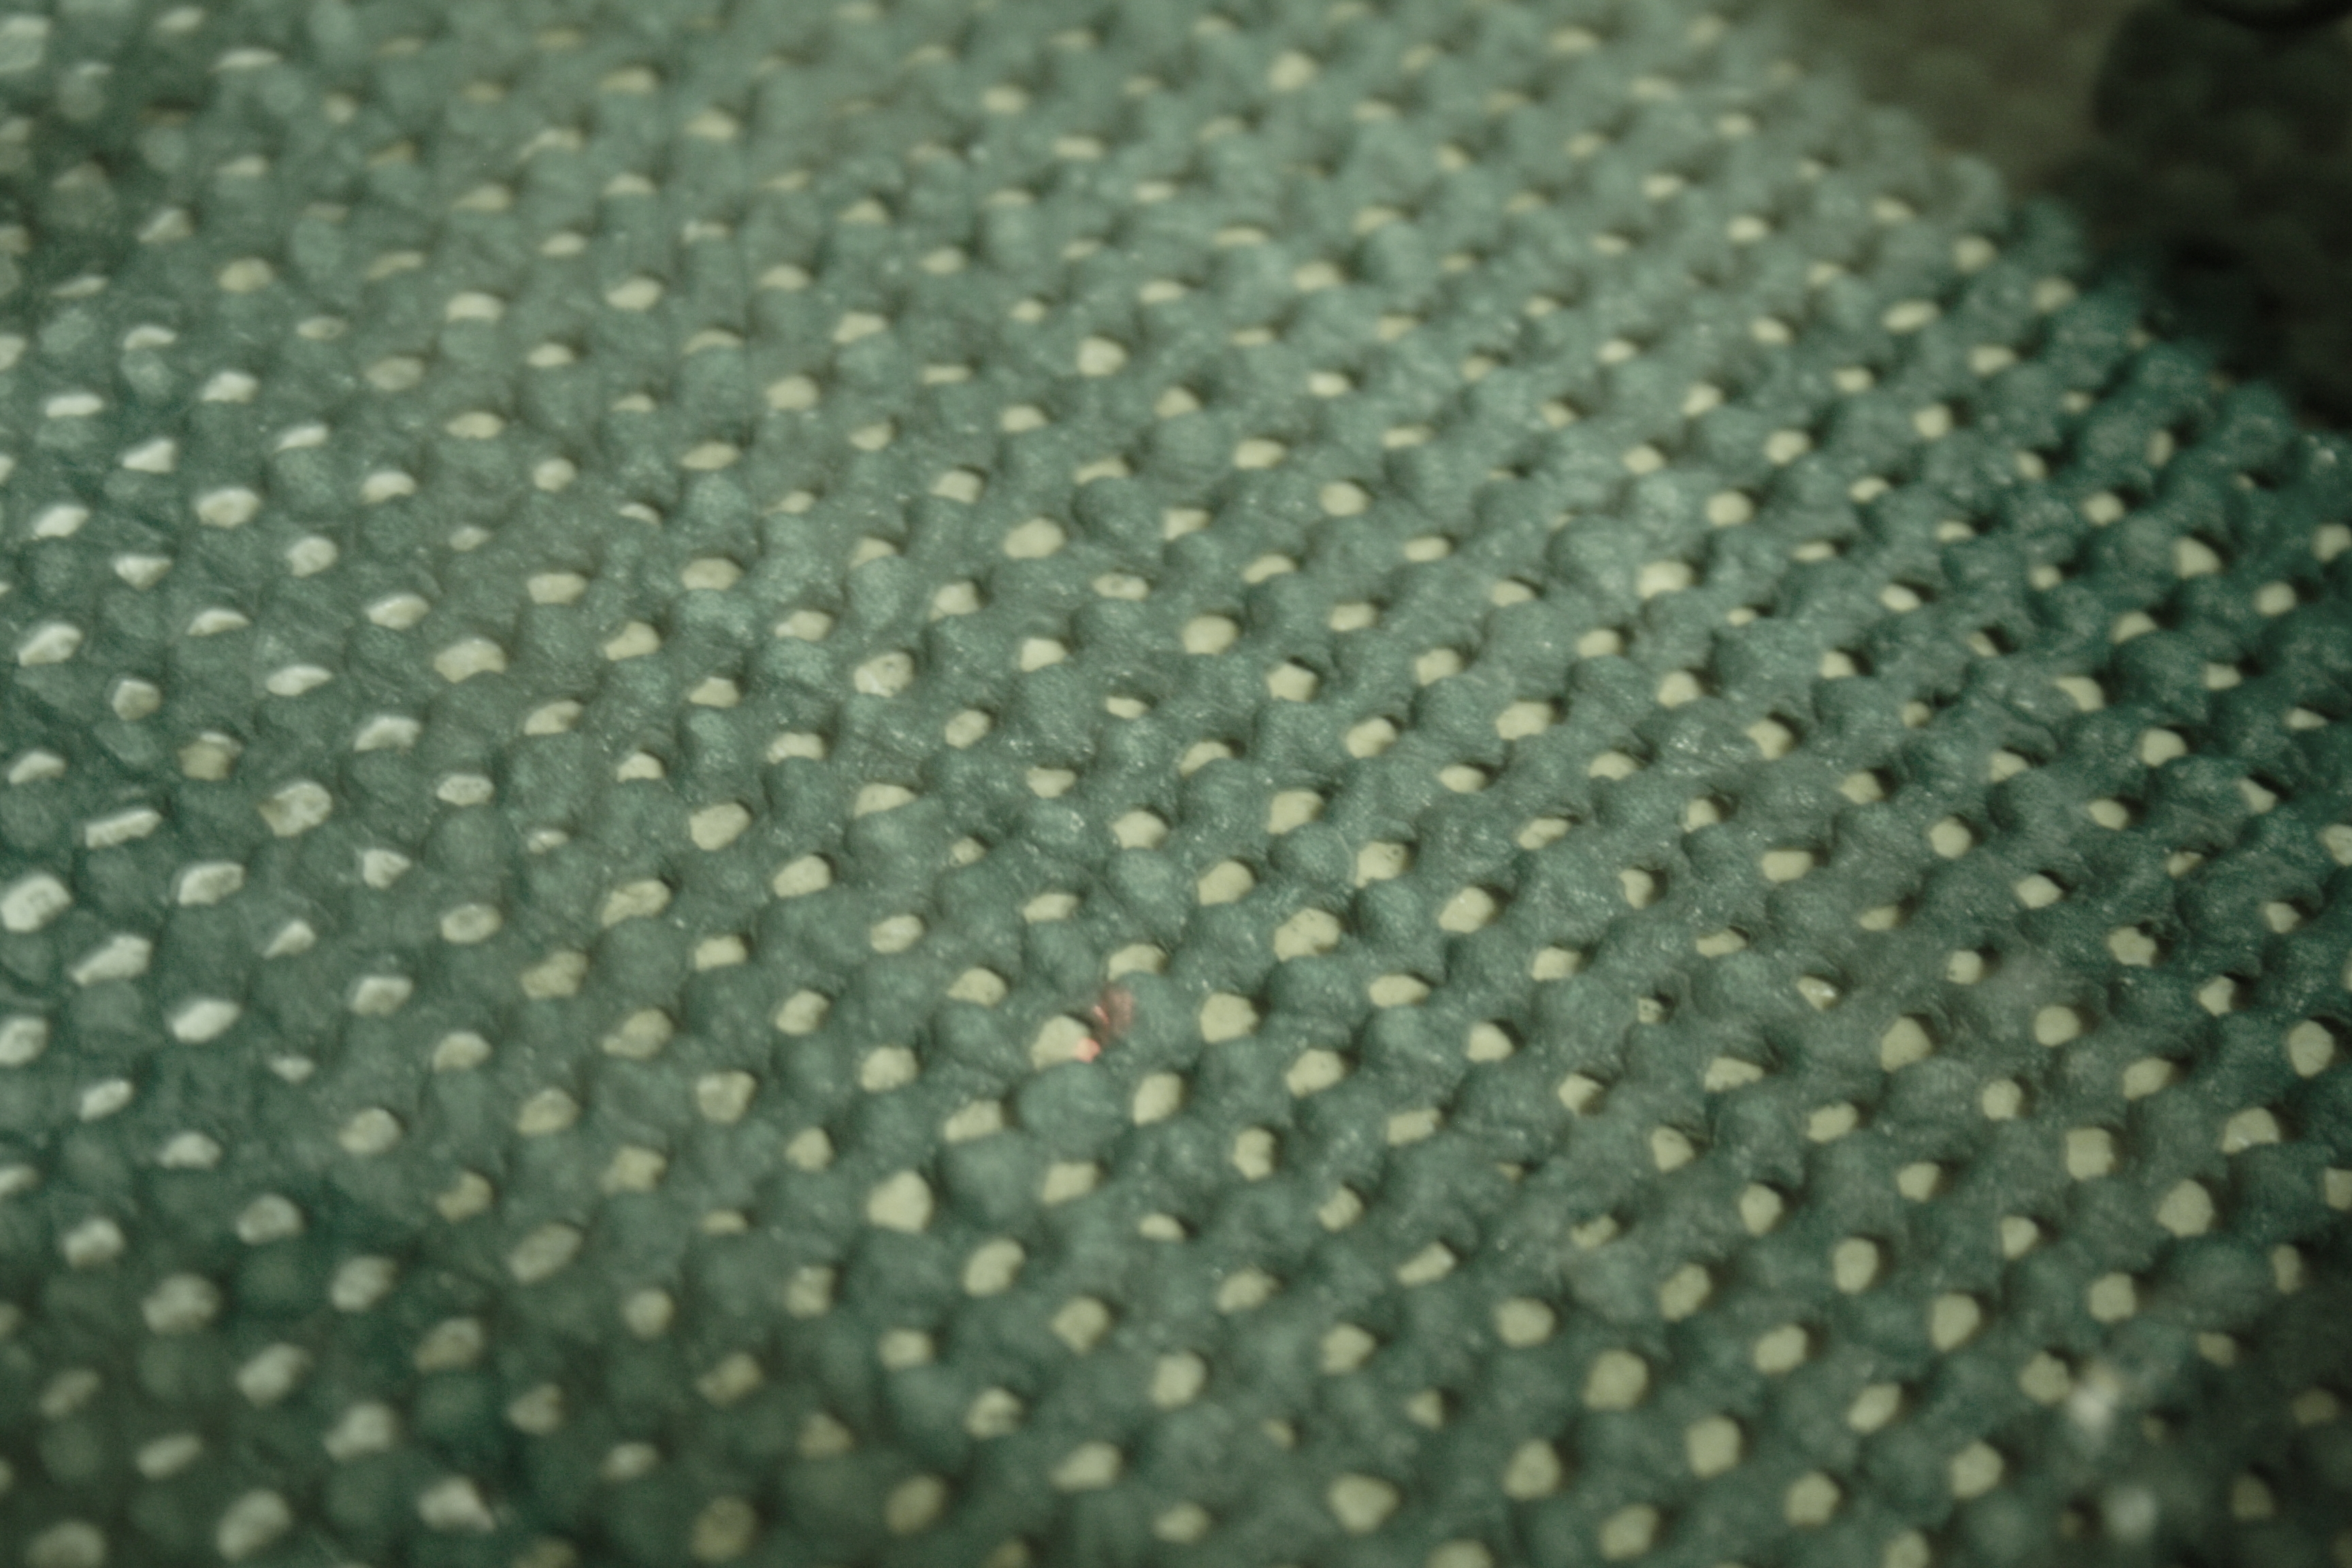 while being somewhat difficult to see, is a small red laser that is shined directly on the mirror surface. If it passes through the top surface of the mirror (polished surface is facing up) then the polishing can considered to be complete. In this image the green tone is caused by the color of the glass. In this case I am using plate glass for the mirror, and also by the green non-skid table place mat I am using to support this mirror when I am polishing. Now as I a have mentioned, I am still not completely polished out, and this is near the edge of the mirror. The previous image was near the center of the mirror, which would be expected if everything is going as planned. The image below, is where the laser is now visible on the top surface of the mirror and partially on the bottom support mat. This is an indication of more polishing needed.
 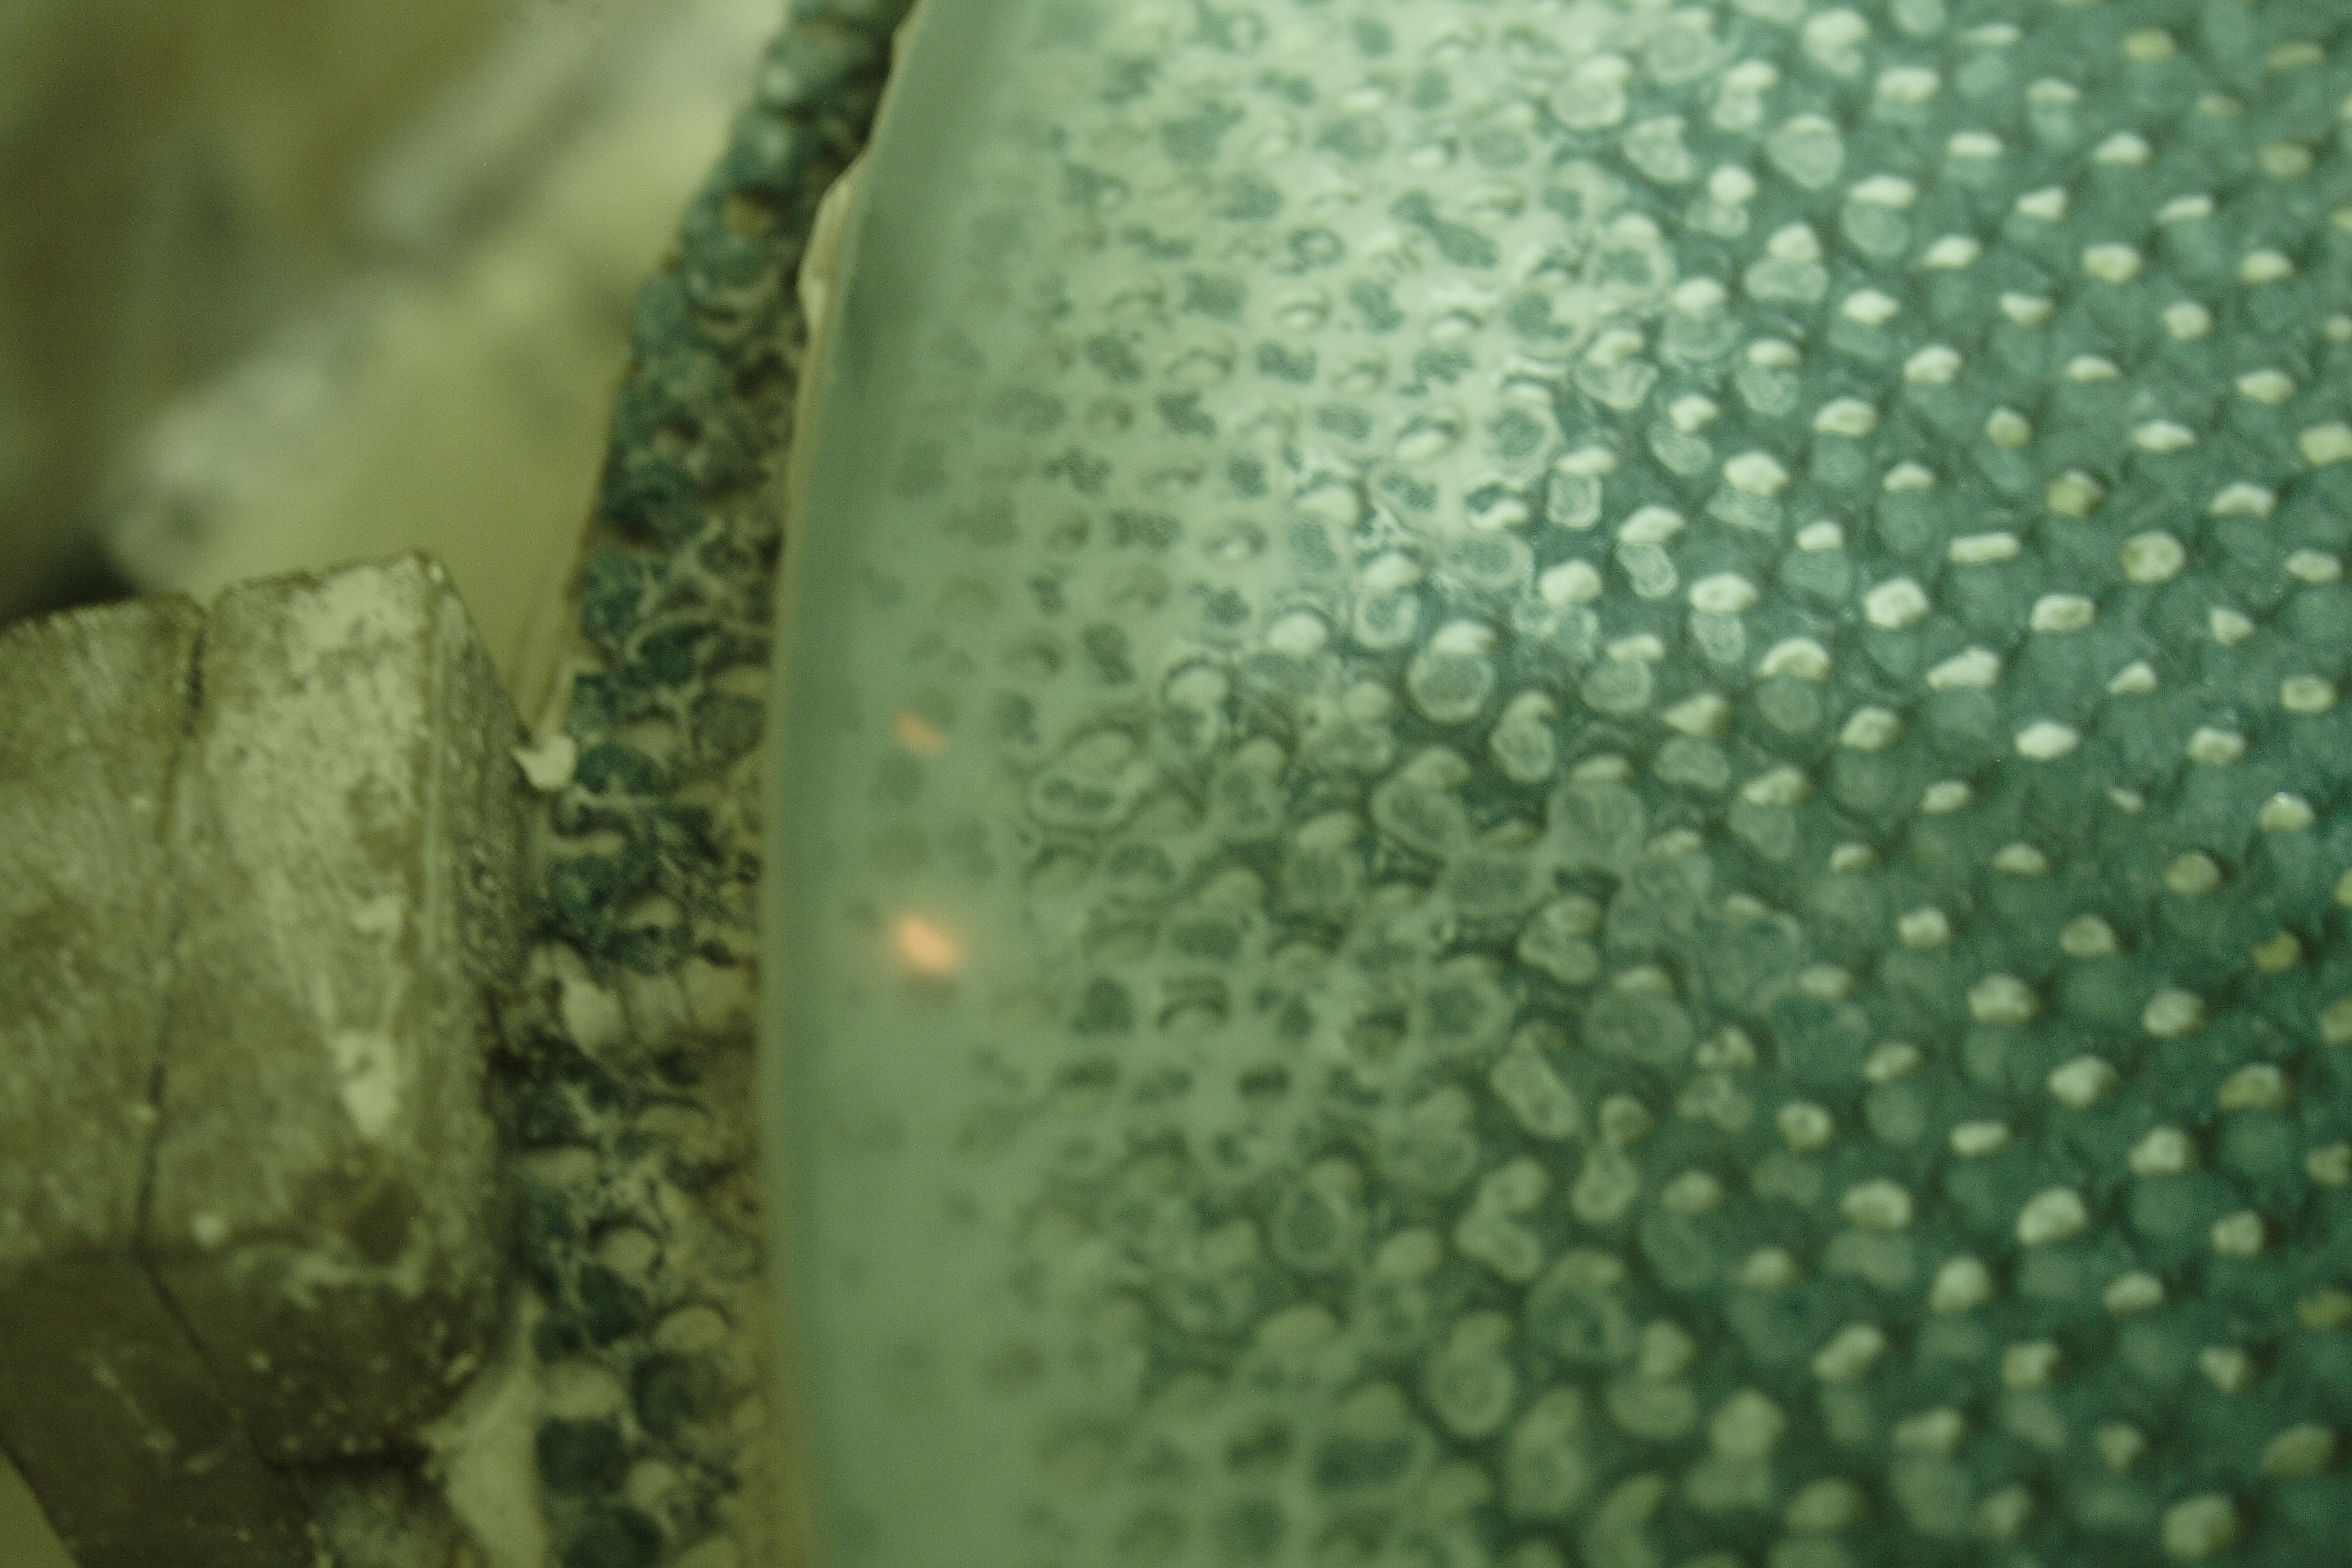 Of significance here, is the fact that it is near the edge of the mirror. The edge of the mirror has more influence on the image than the center of the mirror. Generally,this is the case from the edge to the center, therefore it is more important to have an excellent edge polished out than the very center of the mirror. This, not only from an optical standpoint, but is also because the center of the mirror, approximately 20%, is actually blocked by the secondary mirror in the secondary mirror cage, and no incoming light reflects from that area. In fact, if it were feasible to not even polish it, the telescope would still perform perfectly, because there is no light that can be received by the area behind the secondary shadow anyway. So, at this point, and to summarize, I must continue to polish, and completely remove any evidence of grayness or haziness on the mirror edge. Continue to test with the laser, and when this is not evident. I can move on to figuring, well, maybe. but the step before that is to put the mirror on the test stand. This a completely new stage of the making of the mirror, and exciting time, though because now you are working with an actual reflecting surface, which is beautiful, and gratifying. Soon, soon, but need to complete polishing!!! Stay tuned!
Polishing some More with New Lap
Hello again…Polishing continues. In my previous post, I started polishing with an older lap that had approximately 3/16″ of “Acculap” pitch on a circular 10.5″ plaster tool. Being at least 10 years old, I was suspicious of it’s irregular rotation behavior. This seemed to happen regardless of the position of the center of the lap in relation to the radius of the mirror. Not wanting to waste my effort of fine grinding to this point, I decided to make a new lap, 12″ in diameter, or 3/4 of the mirror diameter (seen in this image here). 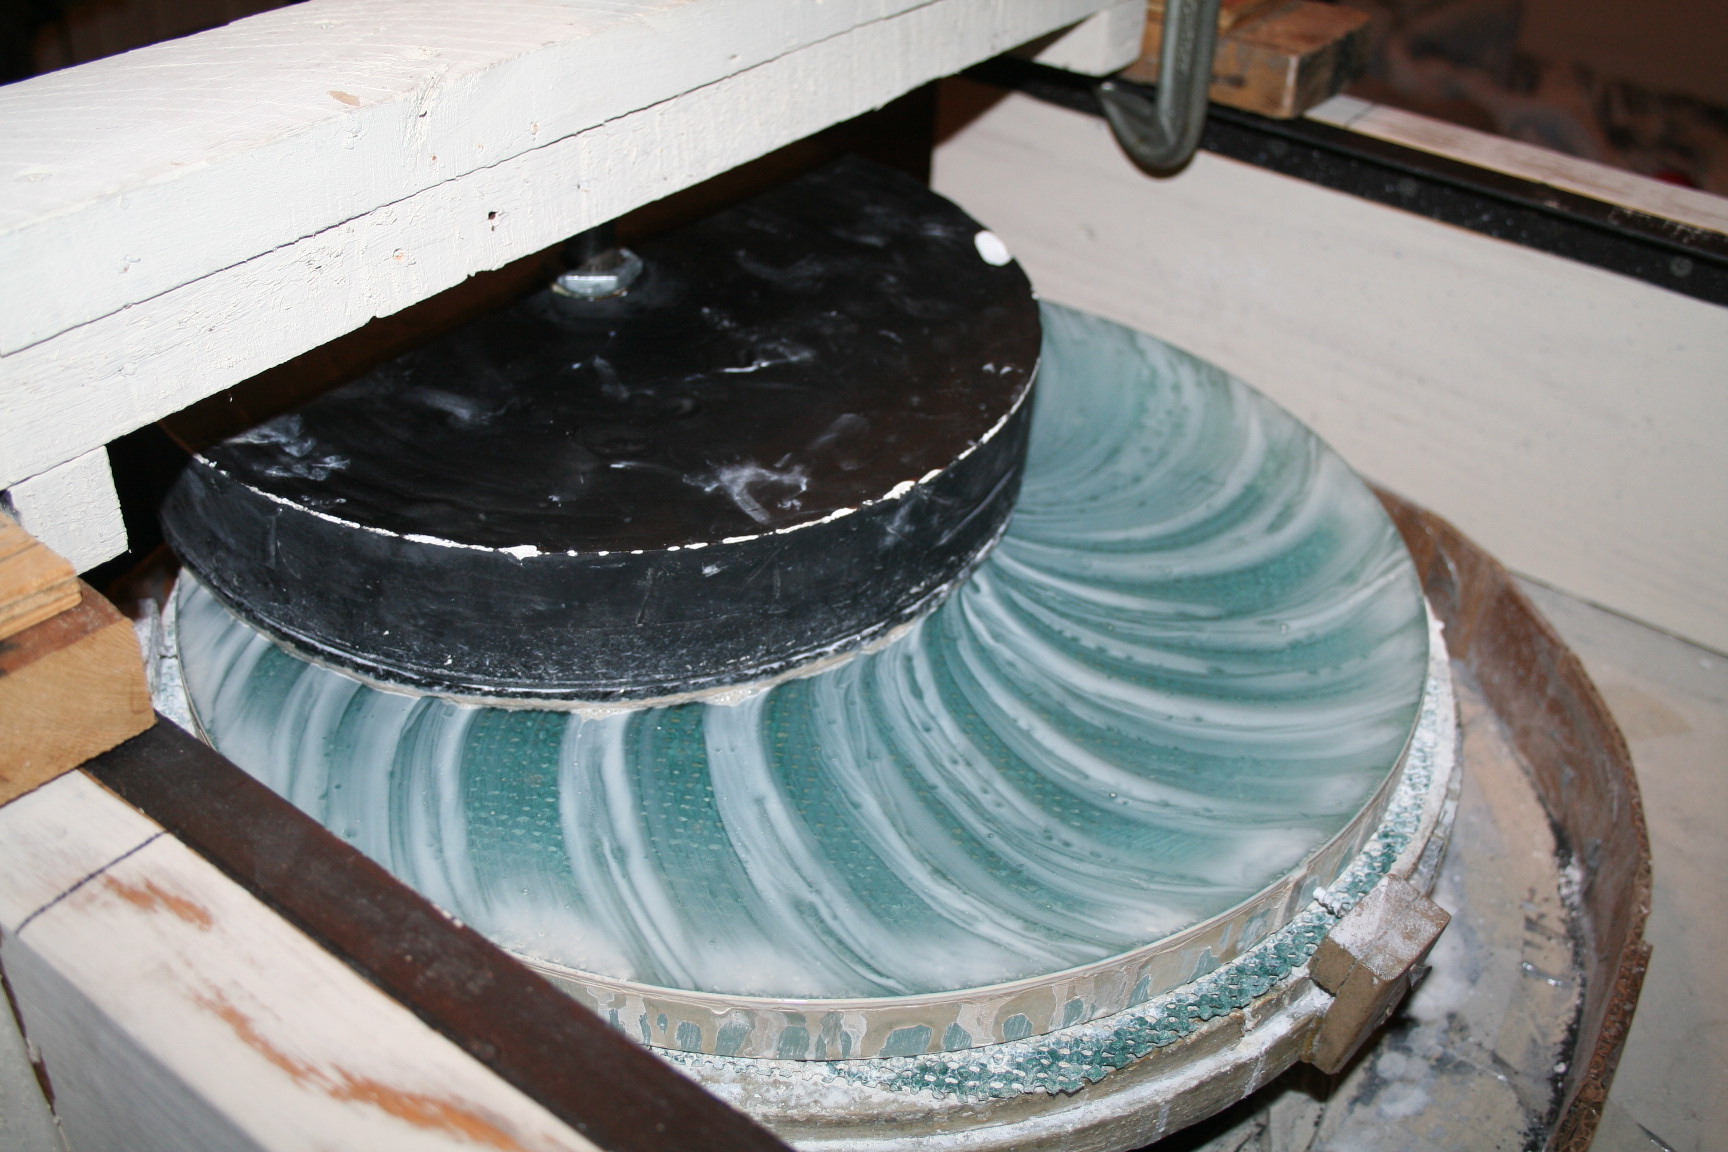 Plaster was my preferred choice for the base material, and “Gugolz” No. 64 pitch was for pitch in lieu of using the “Acculap”. Once the plaster hardened, I used a circular template to locate the center of the lap. I then took a spade bit, as I’ve done with the older lap, to drill a hole large enough to glue in an iron pipe nipple. This will be where the guide shaft will ride and allow the lap to spin while the mirror turntable is rotating. The total polishing time as of this post is only about two hours and already I am seeing a polished surface. Checking this with a laser, there are still areas in the center and about 1 inch of the outer diameter that does not allow the laser to pass through. I am concerned about some unevenness about three inches long on the edge that has not polished out similar to the remaining edge of the mirror. I’ll have to watch this area closely. The laser test I am using to check polishing quality is a simple test using one you can buy for your key chain available almost anywhere these days. The laser works well because it is a very intense light (in my case a common red laser) of a single narrow frequency. Directing the laser on the mirror surface in a darkened room, it becomes very clear where additional polishing is needed or where polishing is not being done on the mirror surface. The ideal situation is when the laser passes thought the polished surface to the bottom surface of the mirror to top of turntable, in effect, showing no reflection. This is a good indication of the mirror having a very highly polished surface and we can now plan to check the mirror for it’s spherical curvature on a test stand. This is an exciting time in the process, when a reflection is apparent, and all the hard work of getting to this point pays off. I will post a discussion on that stage of the manufacturing process when I get there, but for now, it is still more polishing, polishing, polishing…Stay tuned.
New Year New Stage, Polishing
 With the winter Vortex dominating the continental United States and an estimated 200,000,000 million people affected, I, like many were preoccupied with these events, and distracted from my important task of making the mirror. So with that behind us, I had to figure a way to start polishing the mirror. The stages of using 25, 9 and 5 micron went well, and my spherometer readings were very consistent. After about 4 hours of fine grinding between all of the fine grinding polish sizes, I decided to move on the polishing. I had not a lap to use, except one that was about ten inches in diameter, and sitting idle for probably six years or more. The lap was made using Acculap that came out few years ago, synthetically manufactured. I did not know what the hardness was but thought I would at least get started with polishing using this lap. It also did not have a center pivot point using an iron pipe nipple to allow me to use on my machine. I dealt with this by drilling a 1.25 inch hole in the center with a spade bit on my drill press, inserted the fitting in the hole and glue it in place with “Gorilla Glue”. It worked quite well. Unfortunately, however, this lap was not as circular as it should be, and determining where the center was to drill the hole was at best an estimate, and no matter where it was, there would still be uneven rotation when used with the machine. So with what I hoped was a good lap to complete the polishing stage, I first heated it the oven for about fifteen minutes, hot pressed it on the mirror for 6 hours with zirconium oxide slurry. Then I placed the lap on the mirror at a point where the center of the lap was at half the radius of the mirror or about four inches from the mirror edge (for a 16 inch mirror). This left me with about a 1.5 inch overlap on the mirror. I also moved the machine indoors. fortunately I built it small enough to fit through the garage access door, which I believe was about 28″ wide. Once polishing, I noticed an erratic turing of the lap on the mirror. I was hoping this would smooth out eventually, but after about an hour of polishing, no dice. Interestingly enough, with the lap in the position, it even had a tendency to rotate in the opposite direction slightly for awhile. Based on this observation, it appeared the out of roundness and in-precise location of the center of the pivot point on the lap, created an uneven motion of the lap. But after this short time, I still have partial but uneven polish as shown in this image. Looks like I will be making another lap, round with a fairly accurate center pivot point….
Merry Christmas! and on to 5 Micron WAO
Starting to see reflection in the glass from low angle. Spent about three hours fine grinding with nine micron WAO. surface looks pretty uniform, and now apparent scratches, pits or problems. Decided to move to 5 Micron WAO today, Christmas Day. Moved the post to other side of machine so as to promote even wear with castor wheels below turntable. . The caster wheels are pretty basic, from Lowes rubber fixed wheels. They probably have over 50 hours of rotation on them and so far they are holding up. My method of beveling the edge uses the machine advantage as well. I made the device shown in the image where I used gorilla glue to attach a diamond grinder from Harbor Freight tools at a 45 degree angle. (Image is before I started the work) I’m fortunate to have my fixed post with a 3/8″ threaded end in it and using a cap screw I could attached the diamond grinding device I made to the post. Positioning the overarm and lowering the fixed post carefully down through the guide hole, I get the bevel generated in about 10 minutes.
 Here’s an image of the machine in action. It works pretty well, but I had to redo the design of the turntable by using the castor wheels. When I did this, I had to raise the height of the turntable about two inches. This in turn required me to raise the height of my overarm which I had already made using some scrap timber from a wood pallet. This can be useful material, because it is typically hard wood, and in my case free, and perfect for the purpose I intended. My temporary solution, and what works for now, is using blocks under neath each end of overarm to get the added height.The 4″ c-clamps were planned to be used all the time and are functional for holding the overarm during work. So today got one hour of 5 micron fine grindging in, but would be nice if weather warms up a bit, instead of being like winter in the north!
Moved on to 9 Micron WAO

Finally had a chance to move to finer grinding compound. I’m very impressed with how much manual labor can be taken out of making a mirror with a grinding machine. The methods used here are from Gordon Waites youtube videos that area available for all to see. He does not detail much on the machine, but for me, I was piecing my machine together for a number of years and did not resolve the mechanics for quite some time. I ultimately had to do this when I had my tragic accident this past spring. Here I was, final figuring my 16″ F3.8 pyrex mirror, which I had been putzing around with for almost 6 years, (I know what you are saying, just finish it already!) Well it was raining that day, I was wearing foam sandals, the bottoms were wet from standing on the grass washing off zirconium oxide. I stood up with mirror in hand like a waiter with a pizza. I turned and stepped on a smooth concrete garage floor, my foot slipped slightly and guess what, my balance on the mirror changed for an instant, and you know what happened then? Well I’m not sure if you have ever heard a 15 pound pyrex mirror crash on a concrete floor, but let me tell you its a gut wrenching sound and feeling, and that was it, after almost 6 years, what was I going to do?, I had already built the telescope, and now no mirror. My only choice was to complete the machine. So thats what I did.
The Work Begins
Currently manufacturing a 16″ diameter 1″ thick plate glass f3.88 Newtonian telescope mirror. Doing this with my new fixed post grinding machine built this summer. Work is progressing well, and very efficient. Started project in August 2013 and at this point I am ready to move on from 25 micron White Aluminum Oxide to 9 micon White Aluminum Oxide. Cold weather here in North Texas has put quite a damper on the work, and it has been the coldest December ever recorded!!